All Versions
- DSpace 7.x (Current Release)
- DSpace 8.x (Unreleased)
- DSpace 6.x (EOL)
- DSpace 5.x (EOL)
- More Versions...
...
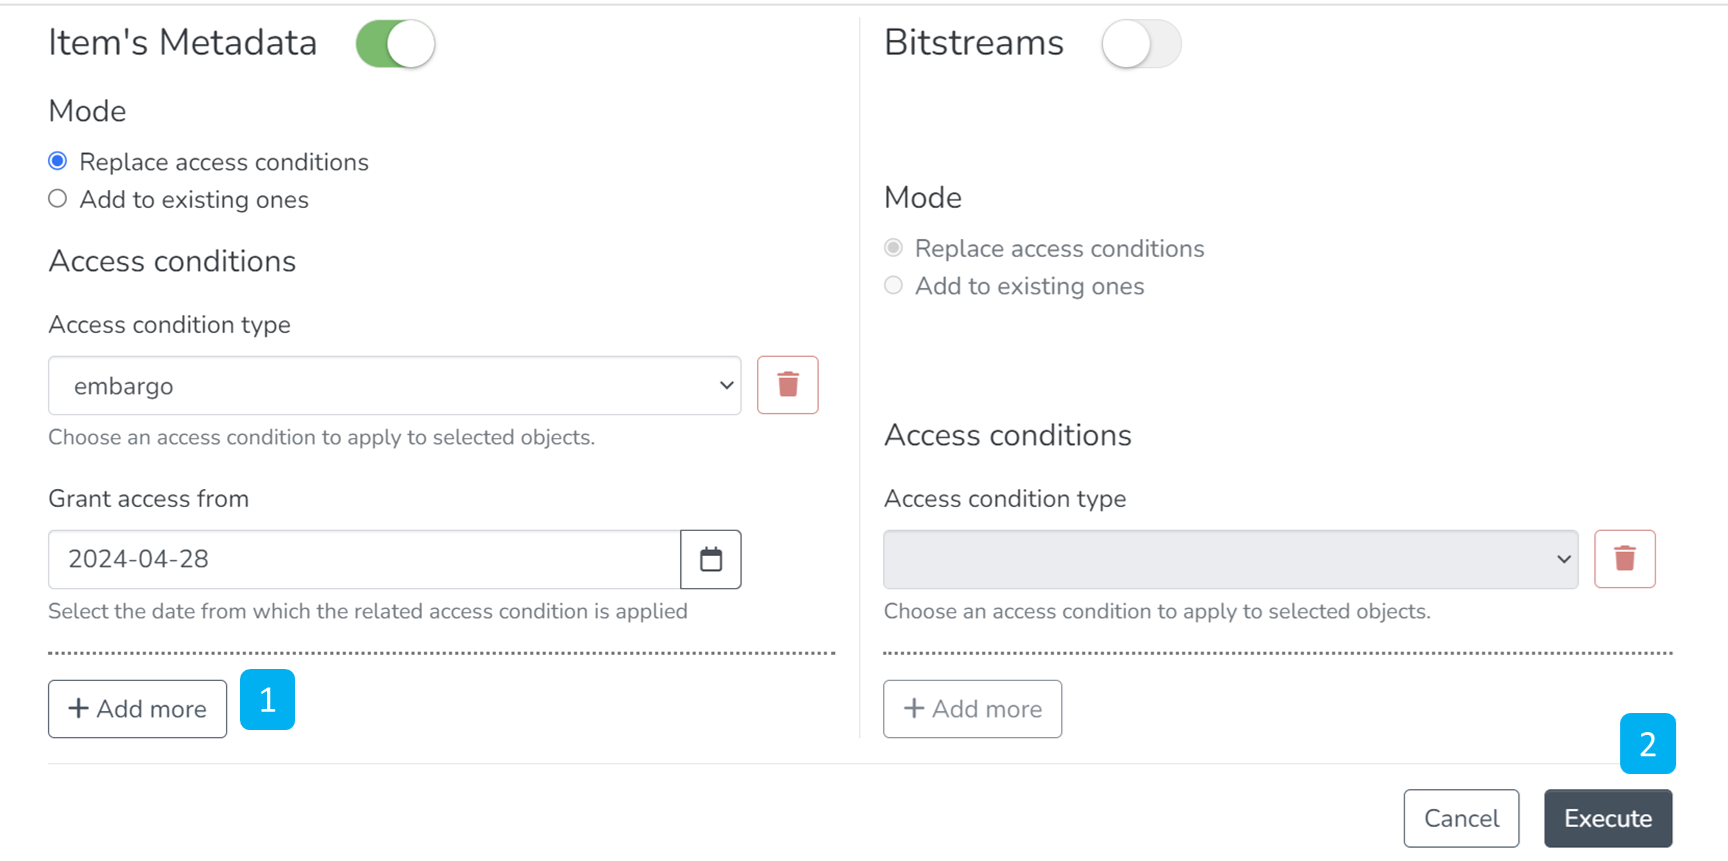
Step 29: Select the 'Embargo' from the drop-down, and in the following field, select an embargo date to limit access to bitstream until the selected date.

Step 2430: Click the 'Add more' button to add another policy by repeating the above steps, and click the 'Execute' button to apply policies to the collection.

Step 2531: Users shall see the following screen upon the successful execution of policies.


Step 1932: The Authorizations tab has all the policies defined for the collection. These are in addition to policies created from the “Assign Roles” tab. Key actions available in this tab are explained below.
...
Step 2033: Click on the 'Add' button to create a new Authorization policy.

Step 2134: Users can add information in the fields available in this form to the policy and save it by clicking the submit button. Please see the description of each field followed by the below screenshot.
...
Step 2235: The item mapper tab allows users to map items from other collections and manage mapped items.

Step 2336: You’ll see items mapped with collections under the “Browse mapped items” tab. Click on the checkbox appearing with each item to select the item(s) required to be unmapped.

Step 2437: After selecting items required to be unmapped, please click on “Remove selected item mappings” to complete the operation. Click on the “Cancel” button on the left of “Remove selected item mappings” to cancel the process.

Step 2538: Click on “Map new items” to search for items for mapping.

Step 2639: After confirming the non-existence of the target item in the existing mapped items list, please click on “Map new items.” Then, enter keywords/keyphrases in the search field to search for target items.
Click on the “Search” button as highlighted on the below screen.
You must know that you can enter keywords or keyphrases from any metadata field. Search The search field under “Map new items” work works exactly like the basic search field of DSpace.

Step 2740: Users can select target items from the search results by clicking the checkbox appearing with items.

Step 2841: After selecting target items, please click on the “Map selected items” button at the bottom of the page to complete the item mapping process.
Click the “Cancel” button to cancel the activity and return to the collection edit page.

Step 2942: A prompt confirming the successful mapping of items will appear upon completing the task, as demonstrated below.
...