Quick Links
Source code on Github
- https://github.com/fcrepo
- (In particular, see the fcrepo project)
Task List on JIRA
Tech Team Meeting Schedule
Mailing list
- https://groups.google.com/forum/#!forum/fedora-tech
- https://groups.google.com/forum/#!forum/ff-internal (private)
Wiki
Java API documentation
Continuous Integration
- https://github.com/fcrepo/fcrepo/actions
- https://hub.docker.com/repository/docker/fcrepo/fcrepo
- Sonatype
- Releases
- Snapshots
Google Docs Folders
Join the IRC Channel
- #fcrepo on irc.freenode.net (or: via Freenode Web IRC )
The Basics
Prerequisites
| Java 11 | Fedora 6 is built and tested using Java 11 |
| Maven 3 | The Fedora 6 build uses Maven. |
| Git | The Fedora repositories are on Github |
Source Control
Fedora uses git, hosted on GitHub, for version control. You can find the main repository at http://github.com/fcrepo/fcrepo.
Setting up your IDE
Eclipse Setup
- m2e Connector
- EGit or JGit plugin
- Sonar plugin - config tbd.
- Set your Eclipse preferences, see fcrepo/src/site/eclipse/README.md
Style Guide
There is a style guide, which should prevent some extravagant commits full of formatting changes.
Build - Maven
Committing Code
Use "
mvn clean verify"to run tests, "mvn clean install"to build and install in local Maven repository (where it can be found by other local projects).- When adding new classes, they should probably not go in the kernel. Look for a submodule or separate project that's appropriate for the functionality you're adding. Ask if it's not clear where something should go.
- fcrepo-http-api (https://github.com/fcrepo/fcrepo/tree/main/fcrepo-http-api) is a good example to follow when setting up new modules (though new modules should be in a separate repo, not in fcrepo4).
- Logging output can be configured using System properties. In general, stacktraces, RDF graph dumps and other verbose output should be logged at DEBUG or higher log level, even in tests. WARN and ERROR should be reserved for unhandled exceptions, failures to persist data, and other repository errors (not client errors that have been successfully handled and reported to the client).
Dynamic build properties
Integration tests use Build Helper Maven Plugin to dynamically generate configuration properties. This is used to automatically detect and configure unused ports for several server components. All dynamically generated properties should have the word "dynamic" in their name.
<plugin>
  <groupId>org.codehaus.mojo</groupId>
  <artifactId>build-helper-maven-plugin</artifactId>
  <configuration>
    <portNames>
      <portName>fcrepo.dynamic.test.port</portName>
      <portName>fcrepo.dynamic.jms.port</portName>
      <portName>fcrepo.dynamic.stomp.port</portName>
      <portName>jetty.dynamic.stop.port</portName>
    </portNames>
  </configuration>
</plugin>
Formatting Rules
The code style conventions used in the project are based on the style-guide defined of Fedora-3. They should prevent commits cluttered with format changes.
Here are the major rules:
- Four space indents for Java, and 2-space indents for XML. NO TABS
K&R style braces
if (code) { // code } else { // code }- Do not use wildcard imports
- Write Javadocs for public methods and classes. Keep it short and to the point
- Avoid public instance variables; use accessors
- Use public methods sparingly; implementation details are not public
- Maximum length of lines is 120 characters.
Create Javadocs for types of at least the following descriptivity
/**
 * @author Joe Developer
 * @since MMM DD, YYYY
 */
public class MyClass
Each source file should contain a license header much like the following:
/**
 * Copyright 2015 DuraSpace, Inc.
 *
 * Licensed under the Apache License, Version 2.0 (the "License");
 * you may not use this file except in compliance with the License.
 * You may obtain a copy of the License at
 *
 *     http://www.apache.org/licenses/LICENSE-2.0
 *
 * Unless required by applicable law or agreed to in writing, software
 * distributed under the License is distributed on an "AS IS" BASIS,
 * WITHOUT WARRANTIES OR CONDITIONS OF ANY KIND, either express or implied.
 * See the License for the specific language governing permissions and
 * limitations under the License.
 */
Use the maven-license-plugin to check for and add missing headers:
Check for missing headersmvn license:check
Add missing headersmvn license:format
IDE Setups
IDE settings are located in the project source. IDE users are strongly recommended to apply these formatting settings.
- Eclipse settings are here: fcrepo4/src/site/eclipse
- IntelliJ settings TBD (purportedly, this plugin will let you use the Eclipse settings above within IntelliJ)
Checkstyle
We're in the process of adding checkstyle enforcement to our modules (meaning, if you violate some of the major style rules, the build will fail).
To check for violations, run the following command:
mvn checkstyle:check
Ensuring that the quality of the code base is maintained (as it is extended, refactored, or otherwise modified) can be addressed through the extensive coverage of functionality by unit or integration testing. One approach often undertaken within the domain of software development is that of test driven development, in which the appropriate testing suites outlining the behavior of some method are structured concurrently or before the method itself is actually implemented. Adhering to this methodology is by no means mandatory, but it does often assist in ensuring that the code base is quality assured to a higher degree.
Writing tests
Unit Tests
Each module has unit tests in the src/test/java/org/fcrepo/ directory and integration tests in the src/test/java/org/fcrepo/integration/ directory.
The unit tests often use mock objects to create surrogates for the Modeshape and webapp machinery that much of the Fedora code interacts with. Some good examples of mock object usage are in the fcrepo-http-api module (e.g., FedoraNodesTest.java) and in the fcrepo-jms-indexer-core module (e.g. IndexerGroupTest.java). By convention, unit test classes are named as: <FunctionalClass>Test.java
Examples
Integration Tests
Integration tests use embedded Modeshape, servlet engine, etc. to run real requests against the code. The web-based tests typically use HttpClient to make requests. Non-web tests, use injection to have the repository and service objects made accessible to the tests (the embedded repository and injection are configured in the src/test/resources directory). Some good examples are in the fcrepo-http-api module (e.g. FedoraNodesIT.java) and fcrepo-kernel module (e.g., FedoraResourceImplIT.java). By convention, integration test classes are named as: <FunctionalClass>IT.java
Examples
Remember to follow the Code Style Guide when writing your test classes. This is especially true if writing a test class is your first foray into contributing to Fedora.
Running the tests
$ mvn test verify
See the fcrepo4 README file for more detailed instructions concerning Maven settings, etc., to build from source.
- PostgreSQL
- MariaDB
- MySQL
Note: The cross-database testing documented below is also included in Fedora's Travis-CI configuration.
Running integration tests against different DBs
Running against PostgreSQL
- Start your postgres database. One way of doing this is via Docker (see postgres instructions).
- Run the Fedora build (assuming db username and password from Docker setup above)
DB=postgresql
DB_PORT=5432
mvn -Dfcrepo.db.url="jdbc:${DB}://localhost:${DB_PORT}/fcrepo" -Dfcrepo.db.user="fcrepo-user" -Dfcrepo.db.password="fcrepo-pw" clean install -P db-test
Running against MariaDB
- Start your postgres database. One way of doing this is via Docker (see mariadb instructions).
- Run the Fedora build (assuming db username and password from Docker setup above)
DB=mariadb
DB_PORT=3306
mvn -Dfcrepo.db.url="jdbc:${DB}://localhost:${DB_PORT}/fcrepo" -Dfcrepo.db.user="fcrepo-user" -Dfcrepo.db.password="fcrepo-pw" clean install -P db-test
Running against MySQL
- Start your postgres database. One way of doing this is via Docker (see mysql instructions).
- Run the Fedora build (assuming db username and password from Docker setup above)
DB=mysql
DB_PORT=3306
mvn -Dfcrepo.db.url="jdbc:${DB}://localhost:${DB_PORT}/fcrepo" -Dfcrepo.db.user="fcrepo-user" -Dfcrepo.db.password="fcrepo-pw" clean install -P db-test
Workflow
The following page is a slightly modified version of the ModeShape workflow.
The Fedora project uses Git, GitHub, and pull-requests for our development. Basically, this process is as follows:
- Setup your GitHub account, fork our GitHub repository, and create a local git repository - This is done just once!
- Work an issue
Why do we like this approach?
This workflow has worked really well for us, for a couple of reasons:
- GitHub accounts are free, and you use your account for all projects you work on.
- GitHub pull-requests are essentially changes to Fedora code that committers/contributors are requesting be merged. GitHub makes it very easy for everyone to see/discuss/review proposed changes. If need be, you can alter your pull-request. If all is well, we will merge your changes into the codebase.
- People can work independently without a lot of coordination.
- You can collaborate with other developers using your public fork.
- Git makes a distinction between the author (you) and committer (a few Fedora committers). So you are recorded as the author of the changes.
How about good ol' patches? We still accept them, so if you prefer using the patch approach you can are welcome to create and submit patches.
Prerequisites
- Git
- Maven3
- Java8
- Sign CLA
Setup
There are a couple of steps to set things up the first time:
Step 1: Create a free GitHub account if you don't already have one. Be sure to set up your account with a SSH key pair and your email address(es) so Git can identify which commits are yours.
Step 2: Go to the Fedora repository on GitHub and click on the "Fork" button
Step 3: Clone the Fedora repository. At a command line, go to a directory where you want the new local repository, and issue the following:
$ git clone https://github.com/fcrepo4/fcrepo4.git
When this finishes you will have a local clone of the Fedora code base, complete with a remote named 'origin' that points back to the main Fedora Github repository.
Step 4: Tell your local clone about your fork of the repository on GitHub:
$ cd fcrepo4
$ git remote add <you> https://github.com/<you>/fcrepo4.git
Now we've set up a local Git repository, we can talk about the steps you'll do much more often.
Pulling Upstream Changes
Start by ensuring that you are on the 'master' branch and that you have no local changes:
$ git checkout master
$ git status
The last command should report something like:
# On branch master
nothing to commit (working directory clean)
Now, we need to pull any changes made to the main repository due to new features or bug fixes.
$ git pull
Now that your local Git repository has the latest, go ahead and push all the new commits to your fork:
$ git push <you> master
This is an optional step. The "master" branch on your fork is not really used at all, but you can keep it up-to-date with the upstream repository if you want.
Make Changes
All changes should be made on topic branches, typically named according to the JIRA issue. (Recommended naming convention "fcrepo-xxxx".) There is nothing special about a "topic" branch -- it is just a normal Git branch that you create and use for a specific topic (i.e., JIRA issue).
NOTE: Pull-requests that use the 'master' branch will not be accepted, even in your fork repository. There are too many things that can go wrong. Firstly, doing so will make it difficult to work on more than one (independent) set of changes at a time; working on 'master' will make your second set of changes dependent upon the first set of changes. Secondly, GitHub pull-requests are tied to branches, so GitHub will want to include all your commits into the same pull-request. Thirdly (and perhaps most importantly), if your commits are not approved, your 'master' branch history will have commits that don't actually appear in the official 'master' branch, and this could be problematic in the future. The 'master' branch in your fork should really be just the local branch that represents the official repository's 'master' branch - use it to pull changes from origin and merge/rebase onto your topic branches.
To create a topic branch, start on a branch you want to base from (which is often 'master'). The following command creates a new branch named "fcrepo-1234" (based off of 'master') and then checks out that branch:
$ git checkout -b fcrepo-1234 master
Work directly in the new "fcrepo-1234" branch. This is where you make your changes and run your new/modified unit tests. When you are happy, stage your changes with:
$ git add .
Do a complete integration build to make sure your new tests pass and that your changes did not cause a regression:
$ mvn clean install
If you need to make more changes, be sure to stage them and re-build.
Committing
Once everything builds, you can then commit your changes to this branch. There are various ways to commit, but this form will commit those changes you've staged and launches the editor where you can type out your commit message:
$ git commit
Be sure to use an appropriate comment. The first line should offer a brief description of the change (less than 50 characters), followed by an empty line, followed by a more detailed description on one or more lines (each line not to exceed 72 characters), followed by an empty line, followed by "Resolves: <ticket URL>"
Address invisible resources during transactions

- Disable Last-Modified and Etag headers during transactions

Resolves: https://jira.duraspace.org/browse/FCREPO-1234
If you think it makes sense to commit multiple times on your topic branch, then feel free to do so. Having multiple commits on a topic branch is perfectly fine for large changes. However, if your topic branch only contains a small number of changes (e.g., fixing a bug in one class and then adding or changing a test case), then it is preferred that they all be made in a single commit.
Note: After a pull-request has been submitted (see below), subsequent commits (based on response to code review comments) should be pushed to the same development branch so that they will automatically be added to the pull-request. Do not squash or amend subsequent commits into your original pull-request commits because it makes finding the deltas much more difficult for the code reviewer.
Rebasing
If you have been working on this branch for a while, other changes may have been merged (from other pull-requests) into the origin repository. Often times this is okay. However, sometimes your local change will be affected by recent merges. It is best to make sure that you update your local clone before you create your pull-request.
To do this, switch to the "master" branch, have Git obtain all recent commits, and then update your branch:
$ git checkout master          # switches to the 'master' branch
$ git pull origin master       # fetches all 'origin' changes and merges
                               # 'origin/master' onto your 'master' branch
$ git checkout fcrepo-1234     # switches to your topic branch
$ git rebase master            # reapplies your changes on top of the latest
                               # in master (i.e., the latest from master will
                               # be the new base for your changes)
At this point, your "fcrepo-1234" branch has been updated (rebased), and you can proceed.
NOTE: Do not ever merge these topic branches onto other official branches, even on your fork repository. If you do that, your "master" branch (or any other official branch) will no longer reflect the official repository.
Push Changes
After you have committed changes locally (and pulled from upstream), you can commit your changes to your fork repository and generate a pull-request. Pushing the changes is easy:
$ git push <you> fcrepo-1234
This will push the commits on 'fcrepo-1234' up to your fork on GitHub.
Create Pull-Request
After pushing your changes into your GitHub fork, you have published your changes but have not really told the Fedora community about them. To do this, generate a pull-request on GitHub. If your commits are on a branch other than 'master', be sure to update the commit range (changing 'master' to the correct branch name). Then record this on the JIRA ticket, and use the URL to the pull-request and include a good comment that describes your changes. Finish the JIRA ticket; the ticket will then be ready to deliver, and the integration managers will be alerted that you have a pull request outstanding.
NOTE: If you use good commit descriptions and fill out a good pull-request description, then you can just paste the same description as the JIRA comment (without the summary line).
After the ticket is put "In Review", one of Fedora's integration managers will be notified of your new pull-request. The role of an integration manager is to review the incoming pull-requests and decide whether they should be accepted and on which branch(es) they should be merged. As such, only a few people have this responsibility.
An integration manager will review your request within a few days, and often much faster. They will comment on your pull-request via the discussion or line notes, or in the JIRA ticket. If they like what they see, they will merge your proposed changes into the correct branch(es), then "Close" your JIRA ticket. However, they may like to see additional changes, in which case they will describe in the pull-request discussion area (or in line notes, or JIRA ticket) what they would like you to change, and "Reject" the ticket, to indicate to the ticket owner that the ball is back in their court. If you disagree, just use the discussion area. Otherwise, go back to your local topic branch for this issue, make the requested changes, commit them locally, and push them to same branch in your fork repository (using the same commands as before). As long as you are on the same branch (not simply named the same, but actually the same branch), GitHub will automatically update the pull-request with your additional commit(s) and notify the integration managers again. Finish the JIRA ticket again. Once the changes are accepted, the integration managers will merge your commits into the upstream repository.
NOTE: After your initial commit, please do not perform "git push --force" on your branch. Doing so requires a complete re-review of the entire pull-request since it is not clear what all changes have been forced. After the code review is complete and ready to be merged into the master branch, you may indicate if you want certain commits to be squashed or not. Typically, if all of the commits are simply iterations on a single unit of work, your commits will be squashed by the integration manager before being merged into master.
Cleanup
There is actually nothing else you need to do. However, you may want to periodically clean up the topic branches that are no longer needed. (Note that if you want to make additional changes on a topic branch and have them go into the original pull-request, do not delete the topic branch in your local repository or your fork repository on GitHub.)
This command will delete a local topic branch:
$ git branch -D fcrepo-1234
This command deletes the remote branch in your fork repository on GitHub:
$ git push <you> :fcrepo-1234
At first blush, the syntax of this second command is a little strange. It is actually a form of the "git push <remote> <localBranch>:<remoteBranch>" command. If you do not specify the local branch, this basically means push nothing onto the remote branch, and Git removes the remote branch.
Configure for Performing Code Reviews
Since pull-requests are used when offering patches for code review, if you are performing a code review, this is one way that you can configuration Git to simplify the process.
At the top-level of the pertinent project directory, change your ".git/config" file as follows (notice addition of line:5)
Example from the "fcrepo4" project... [remote "origin"] url = https://github.com/fcrepo4/fcrepo4.git fetch = +refs/heads/*:refs/remotes/origin/* fetch = +refs/pull/*/head:refs/remotes/origin/pull/* ...Refresh your local cache
git checkout master
git pull
Checkout the pull-request branch for review
git checkout --track origin pull/xxx
- Enjoy the review
Process for using JIRA
- The REPORTER of a story is responsible for providing criteria for CLOSing a story. For code implementation stories, this includes provision of a test.
- Once the story has been evaluatued to be worked, it is moved from the RECEIVED state to the OPEN state.
- The ASSIGNEE of a story STARTs WORK on the story.
- The ASSIGNEE of a story STARTs REVIEW of the story when the work is completed.
- When putting the ticket into REVIEW, a link to the GitHub pull-request should also be included in the ticket
- Note, the ASSIGNEE should STOP WORK on a story if they are temporarily changing focus to a different task.
- The REPORTER (and/or the Tech Lead) reviews/tests the finished code. Then either CLOSEs or REOPENs the story depending on the outcome of the review.
- Once a story is CLOSED, the Tech Lead (or delegate thereof) merges the code into the codebase.
JIRA Workflow

Example
- Jonathan requests the Glacier Mock story. It goes into the RECEIVED state. It has no assignee. It has no acceptance criteria.
- At the sprint planning meeting, we assign acceptance criteria and move the story to the OPEN statue. The story has no assignee to do the work.
- If the story goes into the current sprint, it may not have an assignee (Don't assign assignee to stories outside sprints!).
- At the next daily scrum, Chris decides to work on this story. He STARTs WORK on the story, and makes himself the assignee.
- 3 hours later, Chris is done with the work, makes a pull request, and moves the ticket to IN REVIEW.
- Jonathan (the reporter) reviews the pull request (runs tests, etc.). When Jonathan thinks the ticket is complete, he accepts the pull request and moves the ticket to CLOSED.
- If the work is subsequently revealed to be incomplete, the Tech Lead REOPENs the story.
Terms
- BACKLOG
- Stories that have been accepted are moved to the Backlog.
- SPRINTS
- Stories that have been started must be moved to a sprint. Stories are finished and delivered in sprints.
Process for implementing a fix or feature
- Start work on the ticket in JIRA
- Create an issue branch in your local git
- When you believe the ticket is complete, push the issue branch to github
- Send a pull request to master linking the JIRA ticket in the description
- Link the JIRA ticket to the pull request or commit
- Link the pull request to the JIRA ticket
- Move the JIRA ticket to IN REVIEW
- The reporter should review the change and, if it appears to be complete (including at minimum Integration and Unit Test coverage) move the ticket into CLOSED.
- The reporter should delete the issue branch in github
- The PM or Tech Lead should evaluate the demo and Accept/Reject the ticket
Infrastructure
6 VMs courtesy of Oxford
Hardware:
- Processor: 2 x AMD Opteron 6168 @ 1.90GHz (4 Cores)
- Motherboard: Intel 440BX, Chipset: Intel 440BX/ZX/DX
- Memory: 4096MB
- Disk: 107GB Virtual disk
- Graphics: VMware SVGA II
- Network: Intel 82545EM Gigabit
Software:
- OS: Ubuntu 12.04
- Kernel: 3.2.0-34-generic (x86_64)
- Display Driver: vmware
- Compiler: GCC 4.6
- File-System: ext4
- System Layer: VMware
Our github repository has a post-commit hook that trigger a build on ci.fcrepo.org. This build publishes maven artifacts to sonatype, and pushes the fcrepo-kitchen-sink war to futures6: http://fcrepo4.fcrepo.org/fcrepo/rest/.
Fedora 3 is also deployed on futures6: http://fcrepo4.fcrepo.org/fedora.
Remote Debugging
Remote debugging is very useful for tracing through the source code during the execution of the application. In order to enable remote debugging, you need to provide specific JVM options that tell the servlet container (Tomcat or Jetty) to open a port to which a debugger will attach. Additionally, you need to create a debugging profile in your IDE (Intellij or Eclipse) that specifies the host and port to which to attach the debugger.
JVM Options
Tomcat
On Ubuntu, update your /etc/defaults/tomcat7 file with:
JAVA_OPTS="${JAVA_OPTS} -Xdebug -Xrunjdwp:transport=dt_socket,address=8000,server=y,suspend=n"
Restart Tomcat for the options to take effect.
Jetty (with Maven)
Using `mvn jetty:run`, you can pass in the JVM options at the command line:
> cd fcrepo4
> MAVEN_OPTS="-Xmx1024m -XX:MaxPermSize=1024m -Xdebug -Xrunjdwp:transport=dt_socket,address=8000,server=y,suspend=y" mvn jetty:run -pl fcrepo-webapp/
IDE Debugger Profiles
Intellij
- Select `Edit Configuration`
- Create `Remote` configuration
- Change port to match what you passed above in your JVM options
- Run the debugger
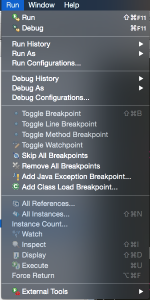
Eclipse
- Select Run -> Debug Configuration
- Select "Remote Java Application" -> New
- Change Host and Port to match your settings and select "Apply"
- Change Host and Port to match your settings and select "Apply"
- Click "Debug" to run the debugger.
Other
Reference Reading
- JCR 2.0 Specification (http://www.day.com/specs/jcr/2.0)
- JCR 2.0 JavaDocs (http://www.day.com/maven/jsr170/javadocs/jcr-2.0/index.html)
- JAX-RS 2.0 Specification (http://download.oracle.com/otndocs/jcp/jaxrs-2_0-pfd-spec/index.html)
- Implemented by Jersey (https://jersey.java.net/)
- Dependency Injection:
- HK2 (https://hk2.java.net/2.2.0-b21/)
- Spring 4.1.1 (http://docs.spring.io/spring/docs/4.1.1.RELEASE/)
JAX-RS 1.1 Specification (https://jsr311.java.net/nonav/releases/1.1/spec/spec.html)
ModeShape
A "distributed, hierarchical, transactional, and consistent data store with support for queries, full-text search, events, versioning, references, and flexible and dynamic schemas", supports the JCR API in addition to its own REST API.
- Project site (https://www.jboss.org/modeshape)
- Java Docs (http://docs.jboss.org/modeshape/4.0.0.Final/api/index.html)
- ModeShape Notes
Infinispan
An "extremely scalable, highly available key/value NoSQL datastore and distributed data grid platform", default storage for ModeShape.
- Project site (http://www.jboss.org/infinispan)
19 Comments
James R. Griffin III
Thank you very much for this documentation. In serving to guide those seeking to evaluate the code base within any context, this is certainly an invaluable resource.
If feasible and appropriate, however, I would be curious as to whether or not the inclusion of selections of unit and integration tests might prove to be slightly more illustrative (for those less familiar with frameworks such as Mockito). An example selection for more rudimentary tests could be:
@Test

    public void testAddType() {

        e.addType(PROPERTY_CHANGED);

        assertEquals(2, e.getTypes().size());


        assertTrue("Should contain: " + PROPERTY_CHANGED, contains(e.getTypes().iterator(), PROPERTY_CHANGED));

        assertTrue("Should contain: 1", contains(e.getTypes().iterator(), 1));

    }


    @Test

    public void testAddProperty() {

	e.addProperty("prop");

        assertEquals(1, e.getProperties().size());

        assertEquals("prop", e.getProperties().iterator().next());

    }


    @Test

    public void testToString() throws RepositoryException {

        final String text = e.toString();

        assertTrue("Should contain path: " + text, text.contains(e.getPath()));

        assertTrue("Should contain info: " + text, text.contains(e.getInfo().toString()));


        assertTrue("Should contain types: " + text, text.contains(Integer.toString(e.getTypes().iterator().next())));

        assertTrue("Should contain date: " + text, text.contains(Long.toString(e.getDate())));


        assertFalse("Should not contain user-data: " + text, text.contains(e.getUserData()));

        assertFalse("Should not contain user-id: " + text, text.contains(e.getUserID()));

    }
...while more complex test cases (i. e. those involving mocking or integration tests) could be showcased using the following:
    @Test

    public void testCopyObject() throws RepositoryException, URISyntaxException {


        final ValueFactory mockVF = mock(ValueFactory.class);

	when(mockSession.getValueFactory()).thenReturn(mockVF);

        when(mockNodes.exists(mockSession, path)).thenReturn(true);

	when(mockContainer.getPath()).thenReturn(path);


        testObj.copyObject("http://localhost/fcrepo/bar");

	verify(mockNodes).copyObject(mockSession, path, "/bar");

    }


    @Test(expected = ClientErrorException.class)

    public void testCopyMissingObject() throws RepositoryException, URISyntaxException {


        final ValueFactory mockVF = mock(ValueFactory.class);

        when(mockSession.getValueFactory()).thenReturn(mockVF);

	when(mockNodes.exists(mockSession, path)).thenReturn(false);


	testObj.copyObject("http://localhost/fcrepo/bar");

    }


    @Test(expected = ServerErrorException.class)

    public void testCopyObjectWithBadDestination() throws RepositoryException, URISyntaxException {

        final ValueFactory mockVF = mock(ValueFactory.class);

        when(mockSession.getValueFactory()).thenReturn(mockVF);

	when(mockNodes.exists(mockSession, path)).thenReturn(true);


        testObj.copyObject("http://somewhere/else/baz");


    }
Also, would it at all be useful to address methodological objectives (speaking, here, specifically to test-driven development practices) within this document? Or is this an implicitly set standard which one would gain from engaging with core committers within the community?
Andrew Woods
Unknown User (griffinj), This is great idea. Could you please create a JIRA item with this same suggestion so it does not fall through the cracks this week?
https://jira.duraspace.org/browse/FCREPO
James R. Griffin III
Andrew Woods Thank you. I have created the JIRA Issue in order to structure these tasks.
Please forgive me for any oversights regarding any Epics to which the Issue may be linked, or any labels which may be relevant for this task. I was also hesitant to assign the task to myself, but I would be eager to undertake a first attempt at modifying the necessary Pages.
A. Soroka
" We use JUnit and Mockito (and, sometimes, reluctantly, PowerMockito.) HTTP Integration tests use grizzly."
Is this all still true? E.g. didn't we get rid of PowerMock at some point?
Andrew Woods
Indeed, PowerMock appears to be gone:
find . -name 'pom.xml' -exec grep -i -H power "{}" \;...comes up dry.
A. Soroka
Champagne all around. PowerMock was useful, but only for evil. I'm in favor of evil as much as the next guy, but there's no question that it militates against the sustainability of a project. Writing tests, generally, seems to me to deserve its own page. Thoughts?
Andrew Woods
The "Guide for New Developers" is a Confluence mash-up of child pages, including:
A. Soroka
Mm. I'm glad I didn't try editing this directly. Also, the page to which you refer seems to have errors pulling in non-existent examples?
Would it be better to swap this mashup for a simple introduction and list of sections (aka other pages like Testing)?
Andrew Woods
I am certainly not opposed to some refactoring here. Maybe we should ask if Bethany Seeger has a memory of her feelings on the setup of this document.
A. Soroka
Bethany Seeger
Here are some thoughts off the top of my head - it's a long page and the parts I found most useful are the basics, the workflow (including JIRA process) and specific git commands to use. So, my thought would be to shorten the page to the most critical info and keep the other stuff as links - for example, maybe only link to the the setup for an IDE for remote debugging and not specifically include it here? It's useful information, but noise if you don't use an IDE.
Also, under Infrastructure - the page describes the 6 VMs, which is interesting, but then just stops there and doesn't really provide any info about how to get access to those. I'd say either include who to contact for access or just remove the section. Makes me think there could be a "Now you're setup, here's some more info about the project" section which that would fit well into.
I'll look over this more later. I haven't read the end part closely yet (show's how much I've used it so far).
Bethany Seeger
And it's probably true that I'm guilting of only picking through this and reading only what I've needed to know in the moment. It's that info that should probably rise to the top. But I know others approach things differently.
A. Soroka
That's what everyone will do, so we just need to figure out what the real "need-to-know" subset is, and get that bubbled up. The rest, IMO, can be linked.
Andrew Woods
Thanks for your input so far... and the rest once you "look over this more later". If you detail your thoughts, A. Soroka or I will use it to do some "wiki gardening". Likewise, you are certainly encourage to make your own updates as well.
Thanks!
Bethany Seeger
One question about editing these - there are links from one child doc to another. Do the child docs need to stand alone? Ie, I was going to take out the style check link in the Basics doc, because in this page the formatting rules section is only a few paragraphs down, so it feels redundant.
A. Soroka
It might be useful to think about milestones here. E.g.,
That sort of thing. Maybe we could come up with a list of such milestones and develop pathways through the wiki for each, beginning each with a special page "So you're ready to X!" This could go as far as badges or the like, for people who never got enough of that via Scouting.
Andrew Woods
That sounds great, A. Soroka! Would it be helpful if we rallied some committers to support the effort? i.e. wiki gardeners?
A. Soroka
Committers would do well, Andrew Woods, but their time is expensive and scarce. I wonder if we couldn't get some other kind of contributor group together here. The knowledge for wiki-gardening overlaps with the knowledge for making code contributions, but the skills don't.
Scott Prater
As a perpetually neophyte contributor, I find myself returning to these pages again and again. I really like the organization and content in this updated page; I don't see the need for much more. I do like A. Soroka's idea of a meta-organization by milestones (though, having been kicked out of Cub Scouts, I can live without the badges).
There's value to both structures: the huge, top-to-bottom reference doc, and the "I want to..." approach. Perhaps the milestone page can be a separate wiki page, linking to the same content?
I'll be happy to review the pages and offer comments.