Each Islandora Solution Pack comes pre-packaged with an ingest form. This is the form that users with appropriate permissions will see when they are adding (ingesting) new items into a collection. This section will describe how Islandora uses content models, and introduce the functions of the XML Form Builder modules. For additional information, including how to install the XML Form Builder modules, please see Chapter 10: Enabling Form Creation with the XML Forms Modules.
This section assumes that you are either using the Virtual Machine image or http://sandbox.islandora.ca OR that you have followed instructions for installing and activating the XML Form Builder modules. Note that use of the Form Builder, particularly advanced use of the builder, will require a knowledge of XPath, and the schema that you are using (and the XSD that defines that schema). Additional information is presented later in this guide.
Ingest forms are affiliated with content models. This means that a collection object that subscribes to a given model will make available to users, on ingest, the form that is associated with the content model. Forms are associated with content models, not collections. A collection will make available all of the forms associated with a content model to which it subscribes.
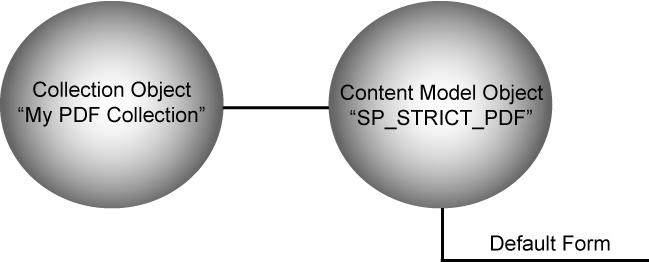
When you use Islandora solution packs, the association to a content model (and its default form) are made for you:
Note: To learn more about objects in Islandora, please review the introduction.
There may be times when you would like to edit a form to make it suitable for your collection. Typically, you would clone the existing form, and then affiliate it with the content model (so that this form becomes available to users when they are ingesting into your collection). Information for how to do this is provided below.
Note that all the forms you create and affiliate with a content model will be available in any collection that subscribes to that content model. This is not ideal in all situations; for example, if you have made a collection-specific form, it will be available on ingest in other collections. The only way to circumvent this is to clone the content model, and make it specific to a particular collection.
By cloning a content model and making it specific to a collection, you can ensure that only the relevant ingest form is presented to a user on ingest. However, any changes you wish to make to forms or content models will then have to be edited individually. Furthermore, the latest iteration of Islandora comes with no interface ability to clone content model. Therefore, cloning the content model must occur through other Fedora tools.
The following section will show you where to access forms in your Islandora installation, and how to clone and edit a form, and associate it with a content model. This section is for people who do not have knowledge of Xpath, and covers only minimal configuration options. If you are more familiar with Xpath, and XML, then we suggest that you go straight to the section on creating custom ingest forms, which provides a more technical overview of the interface, as well as information for creating elements.
To access the XML form builder, log into your Islandora site as an administrator, and navigate to administer>XML Form Builder. You should see the screen below:
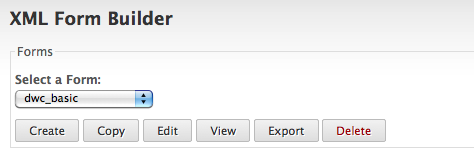
Here you will see all of the forms currently available (from the drop down menu). From this point you can create, copy, edit, view, export, or delete forms. When creating a new form, it is best to start by cloning the existing form associated with the content model your collection is utilizing.
Once you have determined which form that you wish to clone, select it from the drop down menu and click “Copy.” On the next screen you will be prompted to give your form a name:

Make sure your name is something that you will remember. Form names must start with a letter or underscore and they can not contain spaces or special characters. Once you have named your form, click “Copy.”
You will be redirected to the Form editing interface, and receive a message at the top that your form has been successfully created:
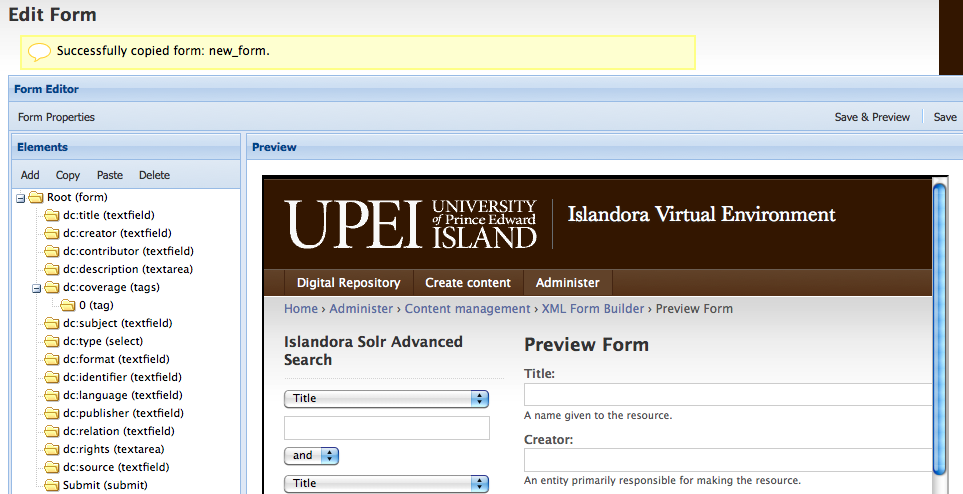
About the Form Builder Interface
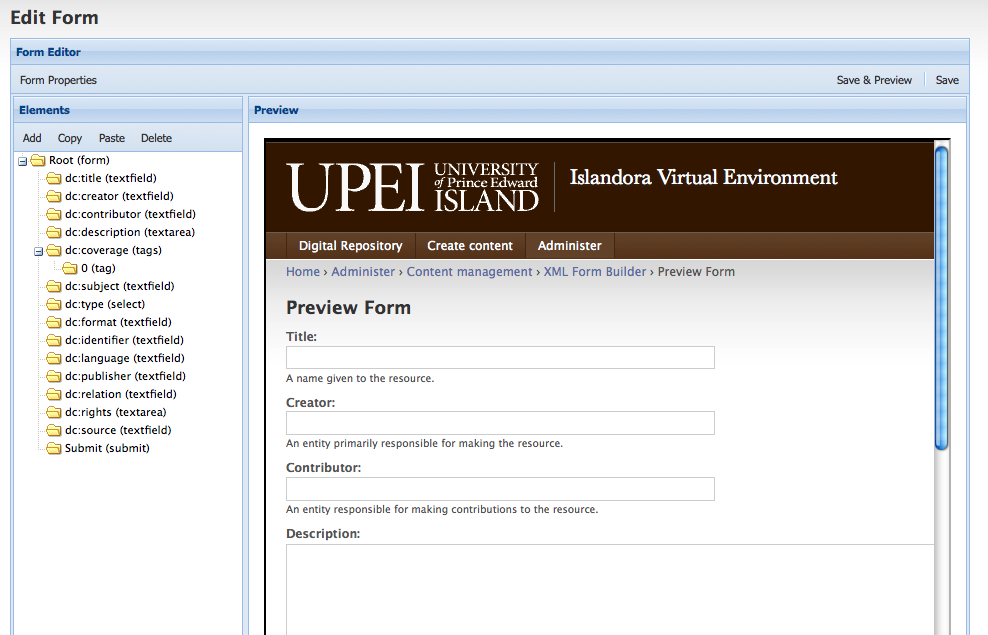
Select “Form Properties” to view the properties of your form.
Under “Elements” you can view all of the fields you have created for your form, as well as make changes to those fields. Clicking on these elements will allow you to view the way that each element will be created, read, updated, and deleted when you interact with the form, and the resulting metadata that the form will write.
“Save” to save changes, and “Save and Preview” to save the changes and render the form in the preview screen.
If you wish to create a form using a new schema, you will have to create a new form from scratch, or clone a form of the appropriate schema. This requires both knowledge of XPath, and of the .xsd affiliated with that schema. If you wish to create new elements, you will also have to be familiar with Xpath.
However, there are several simple “tweaking” functions you can perform that do not require in-depth knowledge of Xpath and your schema’s .xsd. For example, f you wish to delete an element (that is deemed unnecessary for a user to fill out on ingest) select the element with your cursor and click “Delete.”
If you wish to change the label of a field, or populate the field with a default value (for example, if you want to pre-populate an author field for a author-specific collection) then you need to change the element’s properties. To do this, you would select the element, and be presented with configuration options for that element.

Here, I can change the label presented to users interacting with this field, by changing the “Title” of the element. I can also change the description that appears underneath the field, by changing the text in the “Description” field. If I want the field to be pre-populated with the creator’s name, I can also indicate the name in the “Default value field.” In addition, if I want to make this field mandatory for my form, I can select the “Required” checkbox, and this field will appear with an asterisk, and the form will not be able to be submitted without filling in this field. Once I have made these changes, if I press “save and preview,” I will be able to view the form as it will appear to my users.
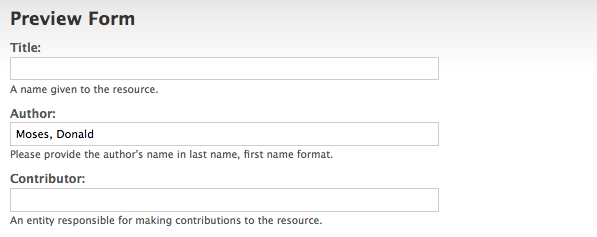
Here you can see I have changed the default “Creator” label to “Author” and have provided customized instructions below this field for my users. I have also pre-populated the Author field with a name. This will prevent unnecessary repetition for users ingesting items into this collection. However, if there is a case where the author’s name is different, the user can still edit this field on ingest.
Once you have tweaked this form, you will have to associate it with the appropriate content model in order for this form to appear as an option for users on ingest. To create an association between your new form and a content model, navigate to Administer>Form Associations. You will be presented with the following screen:
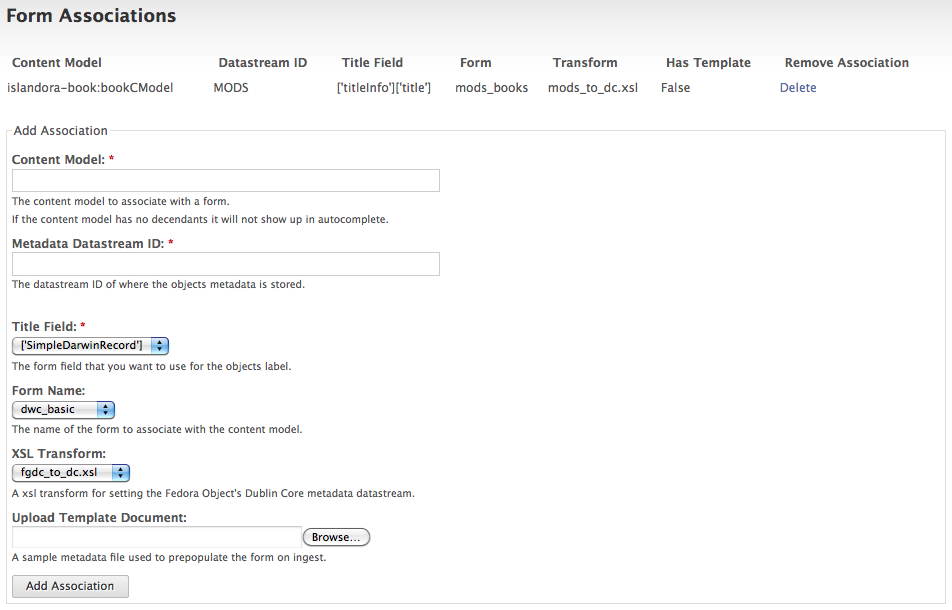
At the top of the screen, you can see that all existing form associations are rendered. In order to fill this form appropriately, ensure that you are familiar with the details of your solution pack - particularly the name of the content model, and the name of the metadata stream it prescribes. If you are not sure, please review the Solution Pack documentation for your installed solution packs.
Begin typing the PID of the content model you wish to affiliate a form with, and the name will auto-complete:

Under “Metadata Datastream ID:” put in the DSID of the Datastream where your content model stores metadata. You must use the existing DSID prescribed in your content model, or this metadata will not appear in your collection objects. If you do not know what the DSID is for your content model, please review the documentation for the relevant content model. When you have entered the DSID for the Datastream where you want your form’s information to be stored, select the “Form Name” from the drop-down menu.
When you do this, you will notice that there is a change in the “Title Field” drop-down menu. Islandora populates this drop-down field with the elements in your form, so that you can choose which form you want to use for the object’s label. Most of the time, you will likely want the object to appear with the label associated with a “Title” element.

Select which field you would like to use for the object’s label. The next two options require a little bit more explanation:
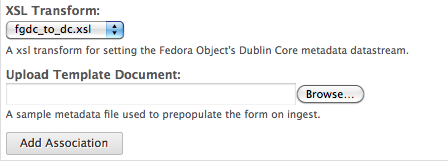
When you select an xsl transform, you are selecting the transformation .xslt file that lslandora will use to crosswalk your metadata to Islandora’s default DC stream. This means that this will always be a .xsl that transforms your schema to DC. For more information about Islandora’s use of .xslts, please review the “Islandora and Metadata” section of the guide. XSLT are called from a folder within islandora_content_model_forms (in the XML Forms modules). In this case, where you are cloning a form, you will want to select the default xsl for your content model. This information is provided in the Solution Pack section of your document.
The “Template Document” is a feature that allows you to submit a form with fields already completed. Usually, this will be a form that you have created by hand in an XML editor. It is not obligatory.
Click “Add Association.” Now, whenever you create an object in a collection that is affiliated with the content model you have used here, you will see your new form as an option to select in the drop down menu.


