VIVO Documentation
Old Release
This documentation relates to an old version of VIVO, version 1.9.x. Looking for another version? See all documentation.
Overview
VIVO supports the concept of an Institutional Internal Class, a class that you can create and assign to your people, and other entities, to indicate that they are part of your institution. Using an Institutional Internal Class, you can limit VIVO's displays of entities to those in your institution.
Create an Institutional Internal Class
Create a local ontology if you do not already have one. If you have one, add a class to your existing local ontology.
Go to Site Admin > Ontology list > Add new ontology
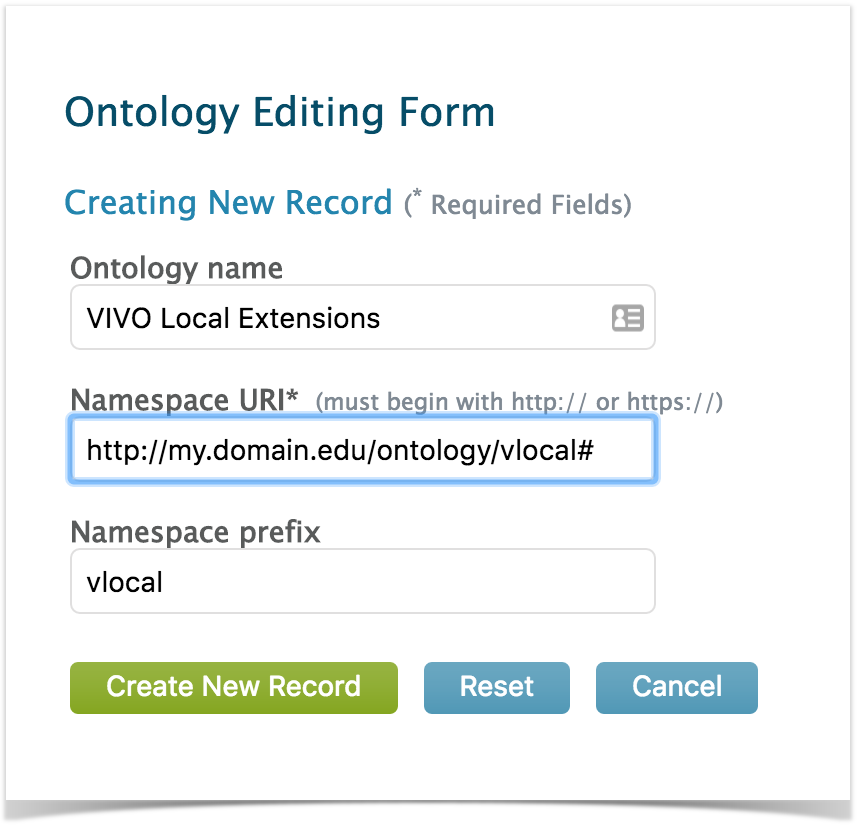
Add your new ontology (see the example below)
Ontology name: Whatever you want. The name you give will appear in the list of VIVO ontologies.
Namespace: Must be your domain name as specified in your runtime.properties, followed by "/ontology/" followed by a name of your choice, followed by the '#' sign.
Namespace prefix: a short word. This word will appear in the prefix list in your SPARQL windows and will be used by you in any SPARQL queries referring to your local ontology.
Submit Changes
Add a new class to your local ontology
Go to 'Hierarchy of Classes Defined in This Namespace’ > Add New Class
Add your new class (see the example below)
Class label: Text, describes the class. This will be visible on the VIVO interface.
Class Group: People. This allows the class to be used to restrict the display of people to those people who have the institutional class you are defining.
Ontology: Select your previously created local ontology from the drop down menu
Internal Name: This word will be used in your SPARQL queries, along with the local ontology prefix to refer to your local class. In this example, the complete reference in SPARQL would be vlocal:MyEntity.
Short definition to display publically: Use language your users will understand
Example for ontology editors: More detail. Can be very technical.
Description for ontology editors: Will appear in the ontology editor. Remind future ontology editors of the purpose of the class and how one will know what entities should be in the class.
Display level: Set to editor and above from the drop down
Update level: Set to curator and Above from the drop down
Publish level: All users including public
Once you are satisfied with the values, press Create New Record
Assign your Institutional Internal Class
Method 1: (Manual)
Go to the person in the UI
Click Edit Individual
Click Add Type
Select your Institutional Internal Class from the drop down
Method 2: (Bulk)
Create a set of RDF, one triple per person you would like to have in the institutional class. Each triple will look like
<personuri> rdf:type vlocal:MyEntity .
Go to Site Admin -> Add/remove RDF Data and add your triples
Use your Institutional Internal Class
Define institutional internal class
Go to Site Admin > Institutional internal class
Select your new class from the dropdown menu
To restrict display to only those people in your institution,
Go to Site Admin > Page Management > People
Click the plus sign to expand the ‘Browse Class Group’ box
Check ‘Only display people within my institution'
Click "Save this Content'


