...
Fedora is available under the terms of the Apache License and has a very active open source community producing additional tools, applications and utilities. Islandora currently uses Fedora version 3.8.1
| Warning |
|---|
NOTE: The recommendation is that for new installations you use Fedora 3.8.1
|
Pre-installation Software Checklist
Fedora must have the following to be set-up and running prior to beginning your installation:
...
- See Setting up a MySQL Database for Fedora for information on configuring the database for Fedora.
Installation Steps
- Download the latest release of the Fedora installer from Fedora Commons (as of this writing fcrepo-installer-3.5, 38.6.2, 3.7.0, 3.8.1 have been tested for use with Islandora).1.jar).
- Read Read through Fedora's Installation and Configuration page to ensure the pre-installation system pre-requisites are met. Actually running the installer is done later.
Prepare your local environment variables by modifying the /etc/profile.d/fedora-profile.sh of the system as the superuser performing the fedora installation ; instead of modifying the /etc/profile.d/fedora-profile.sh, you may create a file with the environment variables, and source it each time you open a new superuser shell to do the installation.
Fedora will need to be given variables to find the main fedora directory, the main tomcat directory, and the location of your Java installation (JDK 8). An example set of [Unix/Linux] environment variables are given here.
The following example assumes Java is installed in /usr/lib/jvm/java-8-oracle and Fedora is installed in /usr/local/fedora.
| Code Blocknote |
|---|
| languagetitle | bash | Bundled Tomcat |
|---|
|
The above Fedora installer will bundle the Tomcat server in the default location (/usr/local/fedora/tomcat). That should be fine for a production environment. If you wish to install Tomcat on a different location you need to be familiar with that process, since we do not provide specific instructions for that. |
| Code Block |
|---|
|
PATH=/opt/java/bin:$PATH:$HOME/bin
export FEDORA_HOME=/usr/local/fedora
export CATALINA_HOME=/usr/local/fedora/PATH=/opt/java/bin:$PATH:$HOME/bin
export FEDORA_HOME=/usr/local/fedora
export CATALINA_HOME=/usr/local/fedora/tomcat
LD_LIBRARY_PATH=$LD_LIBRARY_PATH:$CATALINA_HOME/lib
export LD_LIBRARY_PATH
export JAVA_OPTS="-Xms1024m -Xmx1024m -Djavax.net.ssl.trustStore=/usr/local/fedora/server/truststore -Djavax.net.ssl.trustStorePassword=tomcat"
export JAVA_HOME=/usr/lib/jvm/java-8-openjdk-amd64
export JRE_HOME=/usr/lib/jvm/java-8-openjdk-amd64/jre
export J2SDKDIR=/usr/lib/jvm/java-8-openjdk-amd64
export J2REDIR=/usr/lib/jvm/java-8-openjdk-amd64/jre
export KAKADU_LIBRARY_PATH=/usr/local/djatoka/lib/Linux-x86-64
|
- Before beginning your Fedora installation, create a database for Fedora to use. This is not the same database that used for your Drupal installation.
- Start the installer, navigate to the directory where you downloaded the install file (for Fedora 3.8.1 the installer is called fcrepo-installer-3.8.1.jar) and do one of the following methods:
- CUSTOM INSTALL - Manually:
Run the following command:
| Code Block |
|---|
| language | bash |
|---|
| title | Command Line for "CUSTOM INSTALL - Manually" of Fedora Commons |
|---|
|
$ java -jar ./fcrepo-installer-3.8.1.jar
|
Select the CUSTOM INSTALL.
| Note |
|---|
| title | Selecting "CUSTOM INSTALL" |
|---|
|
It is important to select the Custom Install as it will enable the resource index by default, which is the backbone of Islandora's collection views and other functionality. |
The Fedora installer will prompt you for responses to a series of questions. Answer these questions according to the following "install.properties"example:
| Code Block |
|---|
| title | Example "install.properties" for an OS X Environmentof installation properties/answers |
|---|
|
Installation type - custom
home directory - /usr/local/fedora (default)
Password - [fedora_password]
server host - localhost (default) [could be a domain name etc depending on your environment]
app server context - (default)
API-A - false (default)
ssl avail - true
ssl required for api-a - false (default)
ssl required for api-m - false
servlet included - included (default)
tomcat home -(default)
tomcat http port - 8080 (default)
tomcat shutdown - 8005 (default)
tomcat ssl - 8443 (default)
keystore file - included
databse - mysql
MySQL JDBC driver - (default)
database username - fedoraAdmin
database password - [password]
jdbc url - (default)
JDBC DriverClass - (default)
Use upstream HTTP authentication - false
Enable FESL authz - false
policy enforcement - true
low level storage - akubra-fs (default)
Enable Resource Index - true
Enable Messaging - true
Messaging Provider URI - (default)
deploy local services - true |
| Expand |
|---|
| title | Details about the CUSTOM INSTALL questions |
|---|
|
(Source: Installation and Configuration Guide - Fedora 3.8 Documentation) Servlet Container The installer will automatically configure and deploy to Tomcat 6.0.x and 7.0.x servlet containers. However, if an existing Tomcat installation (as opposed to the Tomcat bundled with the installer) was selected, the installer will not overwrite your existing server.xml, but rather, place a modified copy at FEDORA_HOME/install so that you may review it before before installing it yourself. Other servlet containers will require manual deployment of the war files located at FEDORA_HOME/install.
Application Server Context The installer provides the option to enter an application server context name under which Fedora will be deployed. The context name defaults to Fedora (resulting in http[s]://host:port/fedora), however any other valid context name can be supplied. The installer will name the resulting war file according to the supplied context name (defaults to fedora.war). Please ensure that the servlet container configuration reflects the name of the Fedora context name in case it needs to be configured explicitly. For further details see Alternative Webapp Context Configuration. SSL Configuring SSL support for Fedora's API-M interface is an optional feature. It strongly recommended for production environments if Fedora is exposed to unsecured application and users. However, if your installation is within a managed data center with firewall services, you may choose to provide SSL using a software or hardware front-end instead. For example, a reverse proxy implemented using the Apache HTTP Server and hiding Fedora generally provides better SSL performance. If the Tomcat servlet container is selected, the installer will configure server.xml for you. However, as noted above, if an existing Tomcat installation was selected, the installer will not overwrite your existing server.xml. Please consult your servlet container's documentation for certificate generation and installation. (In particular, the example certificate provided by the installer for Tomcat should not be used in a production environment). If Fedora is configured to use SSL, the JAVA_OPTS environment variable must include the javax.net.ssl.trustStore and javax.net.ssl.trustStorePassword properties. The value of javax.net.ssl.trustStore should be the location of the truststore file and the value of javax.net.ssl.trustStorePassword is the password for the keystore. The following values may be used with the sample keystore included with the installer: | Code Block |
|---|
-Djavax.net.ssl.trustStore=$FEDORA_HOME/server/truststore -Djavax.net.ssl.trustStorePassword=tomcat
|
FeSL The Fedora Security Layer is an experimental feature introduced from Fedora 3.3. FeSL consists of two separate components, which can be selected independently during the installation: FeSL Authentication and FeSL Authorisation. FeSL Authentication is now the default authentication mechanism, however Fesl Authorization is still considered experimental. FeSL Authorization is a replacement for the legacy XACML policy enforcement, so you should not enable XACML policy enforcement if you are going to use FeSL Authorization, as this will provide an alternative XACML policy enforcement engine. See FeSL Installation for more information about FeSL requirements that must be satisfied prior to installation. Resource Index If the Resource Index is enabled, Fedora will use Mulgara as its underlying triplestore, with full-text indexing disabled. Messaging
If Messaging is enabled, Fedora will create and send a message via JMS whenever an API-M method is called. |
Once the script has collected your answers and configured Fedora on your system, the values are written to the "install.properties" file and will have a final location in $FEDORA_HOME/install.
- CUSTOM INSTALL - Automated
- Create an "install.properties" file, similar to the 'Example "install.properties"' referenced above.example referenced on this github link
To create this file:- copy the full contents of the textbox the github link above into a text editor
- where applicable change the database name, database user, database password and database port number, and server host to match your database configuration (these items are noted in square brackets)
- save the edited file as install.properties to the same directory where the fcrepo ".jar" is stored.
Install Fedora by entering:
| Code Block |
|---|
| title | Command Line for "CUSTOM INSTALL - Automated" of Fedora Commons |
|---|
|
java -jar fcrepo-installer-[version number].jar install.properties
[note: 'version number' will vary depending on the version you've downloaded] |
...
| Code Block |
|---|
| title | Command Line for starting Fedora Commons |
|---|
|
# $FEDORA_HOME/tomcat/bin/startup.sh

Using CATALINA_BASE:   /usr/local/fedora/tomcat
Using CATALINA_HOME:   /usr/local/fedora/tomcat
Using CATALINA_TMPDIR: /usr/local/fedora/tomcat/temp
Using JRE_HOME:        /usr
Using CLASSPATH: /usr/local/fedora/tomcat/bin/bootstrap.jar |
To verify that Fedora has successfully started:
...
: /usr/local/fedora/tomcat/bin/bootstrap.jar |
To verify that Fedora has successfully started:
- $FEDORA_HOME/tomcat/logs/catalina.out should contain no errors.
- View your Fedora instance through a web browser:
http://localhost:8080/fedora/
or
https://[yourdomain]:8443/fedora
3. You should see something like this:
Repository Information View
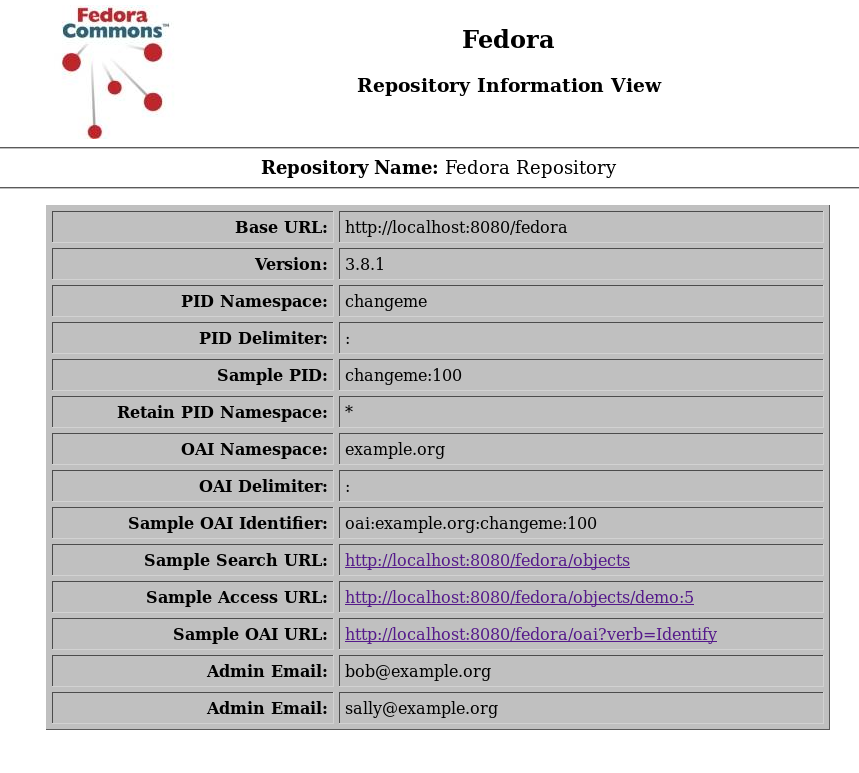 Image Added
...
or
...
...
...
...
3. You should see something like this:
Repository Information View
Image Removed
...
Troubleshooting:
...
If you have problems accessing
http://localhost:8080/fedora you may have to rebuild your database, in particular if you have dropped/recreated the fedora3 database a couple of times:
/usr/local/fedora/server/bin/fedora
...
-rebuild.sh
Setting XACML Policies
Install required polices, remove some restrictive policies.
- First stop your Fedora instance by running:$FEDORA_HOME/tomcat/bin/shutdown.sh
Remove the deny-purge policies:
| Code Block |
|---|
| language | bash |
|---|
| title | Command Line to remove "deny-purge" policies |
|---|
|
$ rm -v /usr/local/fedora/data/fedora-xacml-policies/repository-policies/default/deny-purge-* |
Navigate to the Fedora "repository-policies" directory:
| Code Block |
|---|
| language | bash |
|---|
| title | Command Line to create islandora specific policies |
|---|
|
$ cd |
Troubleshooting:
If you have problems accessing http://localhost:8080/fedora you may have to rebuild your database, in particular if you have dropped/recreated the fedora3 database a couple of times:
...
data/fedora-xacml-policies/repository-policies/ |
Download / Clone the Islandora specific XACML policies from the Islandora GitHub XACML Policies repo
| Code Block |
|---|
|
$ git clone https://github.com/Islandora/islandora-xacml-policies.git islandora |
Remove the anonymous-user
Setting XACML Policies
Install required polices, remove some restrictive policies.
- First stop your Fedora instance by running:$FEDORA_HOME/tomcat/bin/shutdown.sh
- Remove they deny-purge
policies:
| Code Block |
|---|
| language | bash |
|---|
| title | Command Line to remove "deny-purge" policies |
|---|
|
$ rm -v /usr/local/fedora/data/fedora-xacml-policies/repository-policies/defaultislandora/denypermit-purgeapim-* |
Navigate to the Fedora "repository-policies" directory:
| Code Block |
|---|
| language | bash |
|---|
| title | Command Line to create islandora specific policies |
|---|
|
$ cdto-anonymous-user.xml
$ rm -v /usr/local/fedora/data/fedora-xacml-policies/repository-policies/ |
Download / Clone the Islandora specific XACML policies from the Islandora GitHub XACML Policies repo
| Code Block |
|---|
|
$ git clone https://github.com/Islandora/islandora-xacml-policies.git islandoraislandora/permit-upload-to-anonymous-user.xml |
The Islandora XACML policies should now be located in "/usr/local/fedora/data/fedora-xacml-policies/repository-policies/islandora". There should be at least remain only these 4 policies:
- permit-apim-to-authenticated-user.xml
- permit-getDatastream-unrestricted.xml
- permit-getDatastreamHistory-unrestricted.xml
- permit-upload-to-authenticated-user.xml
...
| Warning |
|---|
NOTE: If you can not access the above link for ingestion then something went wrong with your installation. Please retrace your steps carefully, and be sure not to miss anything. |
Create a milestone 1 snapshot backup:
| Code Block |
|---|
# $FEDORA_HOME/tomcat/bin/shutdown.sh
# /etc/init.d/mysql stop

# /usr/local
# tar -cvzf fedora-milestone1.tar.gz fedora

# cd /var/lib
# tar -cvzf -cvzf mysql-milestone1.tar.gz mysql

# /etc/init.d/mysql startmysql-milestone1.tar.gz mysql

# /etc/init.d/mysql start
# $FEDORA_HOME/tomcat/bin/startup.sh |
Automatically starting/restating tomcat:
- If you simply want to automatically start on boot you may want to add this lines to the /etc/rc.local:
| Code Block |
|---|
sleep 10
# $FEDORA_HOME/tomcat/bin/startup.sh |
- To get a more elegant init.d wrapper just follow the hints on this ubuntu post.
For information on using Fedora, make use of the tutorials at the Fedora Commons site.
...