This document is currently being drafted
The VIVO webapp is a sophisticated computer program whose evolution is guaranteed by continuous software development using an Agile software engineering methodology. In this engineering approach, the software testing process must also be managed continuously and be adaptive to new developments that occur over time. The Vivo-regression-testing tool aims to provide the software developer with a test bench integrated into its development environment.
For the IT developer, the test bench is designed to meet the following needs:
In the context of vivo-i18n
The test bench usage is illustrated according to the process described below
| Test case building process illustration | Description |
|---|---|
| Step 1)Selenium includes a recorder that captures the interaction between the user and the browser. The capture of the interaction is stored in the form of a Selenium script. Step 2)The translation of the Selenium script is translated into a JUnit Test Case to which it is necessary to make adjustments for the interpretation of the actions. Step 3)The Java Unit Test is suited for a generalized use in multiple language contexts. Step 4)The test bench encapsulates a set of features and properties that are necessary to parameterize the execution of test cases. This step aims to integrate the test case into these execution parameters. Step 5)Once integrated into the test bench, the test case can be triggered by the development in a singular way or in batch mode according to the needs of the moment. |
the regression testing tool available in this github directory https://github.com/vivo-community/vivo-regression-tests
The figure below shows the architecture of the VIVO-regression-test tool's main components. The architecture is divided into two parts: 1) the client-server side and 2) the client-side.
On the server side, the architecture includes a TOMCAT server running multiple instances of VIVO. The management of these instances is not properly part of this tool, it belongs mainly to the UQAM-DEV tool. On the other hand, the test bench is also an Eclipse project which can be integrated into UQAM-DEV. The availability of multiple concurrent VIVO instances ensures the development of comparative tests between different VIVO implementations (e.g., unilingual VIVO (actuel version 1.11.1)). VIVO i18n, Other VIVO configurations to be evaluated).
On the client side, each test case is an instance of both the Selenium and TestNG frameworks. Selenium consists of a robot programming interface that simulates human interactions on a web site through a web browser while TestNG is used to schedule the progress of the regression test. Each interaction through the user interface is evaluated and measured to validate the accuracy and consistency of the information produced by the VIVO instance being tested. During possible updates (addition/deletion/modification) of data, the test case can evaluate the accuracy of the data stored in the triplestore through the Apache Jena APIs. The 'Main Test Runner' is the main application that coordinates the execution of suites (aTestSuite) and test cases (aTestCase). The MainTestRunner exists in two forms. The first form starts its execution by the Maven utility and is set up by configuring the pom.xml and settings.xml files. The second form is a Java application which is parameterized by the configuration of the TestRunner.propreties file.

The figure below shows the structure of the Java packages in the test bench. Each package is associated with a label describing the package's usefulness.

The figure below shows the java class structure for the ResearchOverviewToPersonUnitTest_{$linguistic-context} test case. The test case is particularized for each language context to be evaluated (en_CA, en_US, fr_CA and orig). Each test case is an instance of the abstract class (e.g. ResearchOverviewToPersonUnitTest.java) that contains the test sequence to be performed. Finally, the TestBenchModel class is the super abstract class from which all the test cases of the test bench are derived. This abstract class encapsulates all the functionalities and properties of the test bench. The MainTestRunner is responsible for the execution of each test case,

The diagram below shows the utilities classes and resources files necessary for test bench operation.

In general, each test case is divided into 5 phases in addition to the setUpBeforeClass et tearDownAfterClass
| Five phases pattern of testCase | Description |
|---|---|
| setUpBeforeClass |
|
| Phase 1 |
|
| Phase 2 |
|
| Phase3 |
|
| Phase 4 |
|
| Phase 5 |
|
| tearDownAfterClass |
|
Introduction
Faire le sommaire des étapes
Using Windows GitBash |
This is not a mandatory step. On the other hand the references to the directories that will depend on C:/UQAM-DEV, which is its installation directory.
For complete installation, following: 2. Installing UQAM-DEV
Install Tomcat and SOLR as indicated in the Lyrasis documentation. https://wiki.lyrasis.org/display/VIVODOC111x/Installing+VIVO
Or these documents more specific to this installation:
https://wiki.lyrasis.org/display/VIVO/1%29+Starting+with+basic+installation%3A+Java-Maven-Solr-GIT
https://wiki.lyrasis.org/display/VIVO/3%29+Installing+Tomcat+8.5+for+Vivo-1.11.0-i18n
export REG_TEST_HOME=/c/UQAM-DEV # Home regression test directory export REG_TEST_GIT=$REG_TEST_HOME/GIT # GIT extraction directory export JAVA_HOME=$REG_TEST_HOME/jdk # Java Jdk 1.8 export SOLR=$REG_TEST_HOME/solr-7.7.2 # Solr 7.7.2 installation directory export TOMCAT=$REG_TEST_HOME/apache-tomcat-8.5.11 # Tomcat installation directory export VIVO_HOME_I18N=$REG_TEST_HOME/vivo_i18n # Vivo-i18n Home directory export VIVO_HOME_ORIG=$REG_TEST_HOME/vivo_orig # Vivo original (non-i18n) Home directory |
export REG_TEST_HOME=YOUR_VALUE # Home regression test directory export REG_TEST_GIT=YOUR_VALUE # GIT extraction directory export JAVA_HOME=YOUR_VALUE # Java Jdk 1.8 export SOLR=YOUR_VALUE # Solr 7.7.2 installation directory export TOMCAT=YOUR_VALUE # Tomcat installation directory export VIVO_HOME_I18N=YOUR_VALUE # Vivo-i18n Home directory export VIVO_HOME_ORIG=YOUR_VALUE # Vivo original (non-i18n) Home directory |
export REG_TEST_HOME=/opt/tomcat export REG_TEST_GIT=/opt/tomcat/GIT export JAVA_HOME=/usr/lib/jvm/java-8-openjdk-amd64 export SOLR=/opt/solr export TOMCAT=/opt/tomcat export VIVO_HOME_I18N=/opt/tomcat/vivo_i18n export VIVO_HOME_ORIG=/opt/tomcat/vivo_orig # You can also source the ./linux_var_dir.sh file |
While waiting for the integration of the development branches to the Master branch, it is necessary to perform the extractions from the following repo:
Repos are retrieved from the $REG_TEST_GIT
cd $REG_TEST_GIT |
| Repo name | GIT clone commans | |
|---|---|---|
| Vitro |
| |
| Vitro-languages |
| |
| VIVO |
| |
| VIVO-languages |
| |
| Vivo-regression-test |
|
The installation procedure below refers to the official Lyrasis installation guide, available here.i: https://wiki.lyrasis.org/display/VIVODOC111x/Installing+VIVO
| Description | Bash command | |||
|---|---|---|---|---|
| 1 | Vivo Home and Vivo solr configuration from the directory |
| ||
| 2 | rom the directory C:\UQAM-DEV\GIT\vivo-regression-tests Installing VIVO 1.11.1 original |
|
| Description | Bash command | |||
|---|---|---|---|---|
| 1 | Vivo Home and Vivo solr configuration for i18n from the directory |
| ||
| 2 | From de vivo installer for i18n: cd $REG_TEST_GIT/vivo-regression-tests/vivo-installer-i18n install the vivo-i18n (solr and vivo_home are pre-configured with the UQAM-DEV installation) |
|
This section is used to verify the co-execution of VIVO-ORIG and VIVO-i18n.
| Description | Bash commands | |||
|---|---|---|---|---|
| 1 | Starting solr
|
| ||
| 2 | Start TOMCAT |
| ||
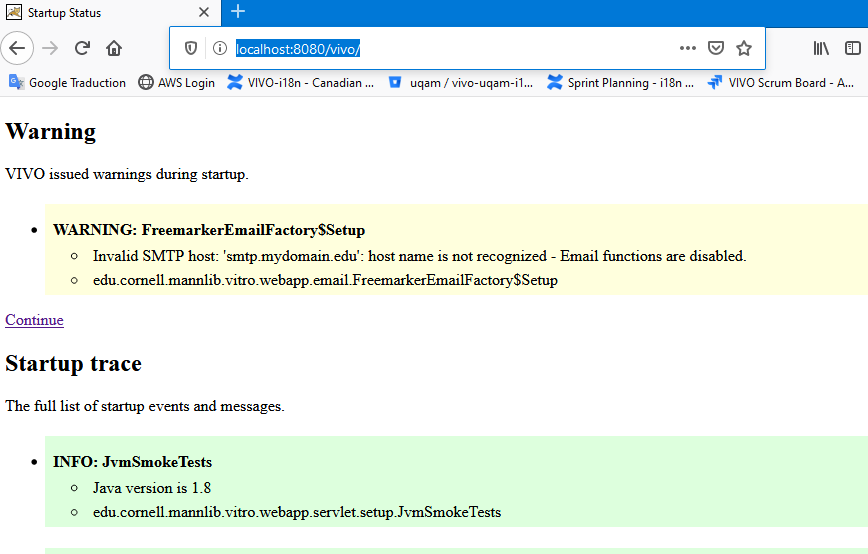
| 3 | Verify VIVO i18n at http://localhost:8080/vivo/ |
| ||
| 4 | Verify VIVO otiginal at http://localhost:8080/vivo_orig/ |
|
| Description | Commands | |||||||||
|---|---|---|---|---|---|---|---|---|---|---|
| 1 | a) Setup VIVO_ORIGAssign the password for for the user admin |
| ||||||||
| 2 | Edit the file C:\UQAM-DEV\vivo_orig\home\config\runtime.properties | Make sure the variable rootUser.emailAddress matches the login you entered in the last step. Don't worry about the variables below, they are not enabled for version 1.11.1 of VIVO. rootUser.passwordChangeRequired | ||||||||
| 3 | b) Setup VIVO i18n | edit C:\UQAM-DEV\vivo\home\config\runtime.properties Validate that the variables are correctly configured rootUser.emailAddress = vivo@uqam.ca | ||||||||
| 4 | Restarted Tomcat if changes have been made to any of the runtime.properties files. |
| Description | Commands | |
|---|---|---|
a) testbench runtime.propertiesEdit the file C:\UQAM-DEV\GIT\vivo-regression-tests\src\main\resources\runtime.properties | Make sure that the content (especially the credential section) corresponds to the VIVO login values.
| |
b) TestRunner propertiesEdit the file C:\UQAM-DEV\GIT\vivo-regression-tests\src\main\resources\TestRunner.properties | Select the test case you want to run e.g.:
| |
c) Maven profileEdit the file C:\UQAM-DEV\GIT\vivo-regression-tests\settings.xml | Select the test case you want in the activeProfile section. Seul une profile peut être sélectionné e.g.:
| |
d) For Linux, Installing geckodriver |
|
| Description | Command | |
|---|---|---|
a) TestRunner Java runtime mode |
| |
b) Test case running by profiles setting in settings.xml |
| |
c) Test case running by profiles in options |
|
Done