Introduction
Initial concepts
Selenium is a tool that lets you create tests using Firefox. Selenium lets you create a test by navigating through your web site and interacting as you would normally, while Selenium records your actions. After the test has been recorded, Selenium allows you to edit the test, and save it as a simple HTML file.
A Test should exercise a simple unit of functionality and check that it works as expected. For example, Log in to VIVO as the default admin user and create a new user account.
A Test Suite is a group of tests that will be run in sequence. A suite should contain a group of related operations that exercise an area of functionality. For example, managing user accounts.
The Test model is a collection of data that will be loaded into VIVO before each suite is run. This is not automatic when you are writing tests - only when they are executed as a batch script.
Tests can have an effect on other tests within the same suite. For example, one test may create a new user. A second test might delete that user. The data model is only reset between suites.
The test model
So far, the test model is very simple. It contains 4 user accounts, so you will not need to create them in your tests. The model records that each of the users has already logged in, so you will not need to do a first-time password change in your tests.
| User | Password | Role | |
|---|---|---|---|
| testAdmin | testAdmin@cornell.edu | Password | system administrator |
| johnCurator | johnCurator@cornell.edu | Password | curator |
| sallyEditor | sallyEditor@cornell.edu | Password | editor |
| joeUser | joeUser@cornell.edu | Password | self-editor |
Prepare your working environment
Prepare your VIVO application
Create a VIVO development area
You will need to have a VIVO development area on your computer, along with things like Java and Tomcat. This document won't tell you how to create a development area.
In these instructions,
the term [VIVO] will refer to the top directory of VIVO source code fetched from the GitHub,
the term [VIVO_HOME] will refer to the top directory of your Vivo development area, and
the term [VITRO_HOME] will refer to the top directory of your Vitro development area.
(For some developers, this will be within the Vivo area, but for most developers it will be a separate area).
Clean your database
As you develop the acceptance tests, you will frequently want to clean your database, so it will contain exactly the same data each time the tests are run. It may be helpful to create a script that will do this. You should create a script file, called something like cleanDatabase.sh (Unix) or cleanDatabase.bat (Windows).
If you are using TDB storage, it is necessary to reinitialize the content of the VIVO triplestore. To do this it is necessary to delete the directories rdf, tdbContentModels, tdbModels contained in[VIVO_HOME].
Copy the text below into the script. Substitute the VIVO_HOME with the path to the top directory of your Vivo development area. Moreover, check the path to the tdbContentTripleSource directory in [VIVO_HOME]/config/applicationSetup.n3
cd $VIVO_HOME
rm -r rdf
rm -r tdbContentModels
rm -r tdbModels
If you are using SDB storage preserved in MySQL, copy the text below into the script. This should all go on a single line:
mysql --user=[mysql_username] --password=[mysql_password] --database=[database_name} --execute="drop database [database_name]; create database [database_name] character set utf8;"
Substitute the user name, password and database name, taking the appropriate values from your runtime.properties file (deploy.properties prior to version 1.6). So, for example, on my system, the script would look like this:
mysql --user=vUser --password=vPass --database=vivo --execute="drop database vivo; create database vivo character set utf8;"
Stop Tomcat if it is running, and run this script to clean the database. The next time you start VIVO, you may need to allow some extra time for it to load the default model data files into the database.
Install the test model data file
Copy the test model data file
from here:[VIVO]/selenium/test-user-model.owl
to here: [VIVO_HOME]/rdf/auth/firsttime/test-user-model.owl
Build the application
Rebuild VIVO (mvn install -s example-settings.xml) and start Tomcat.
Confirm that the test data is available
- Go to the home page of the VIVO application on your computer
- Log in as user "testAdmin@cornell.edu", password is "Password"
- Go to the "User Accounts" page and confirm that you also have accounts for John Curator, Sally Editor, and Joe User.
Prepare Selenium
Selenium is an add-on for Firefox.
It is formally known as "the Selenium IDE", to distinguish it from other Selenium products. I will continue to refer to it simply as "Selenium".
Install and configure Selenium
Start Firefox, and go to [http://seleniumhq.org/download/], where you will see a link to download the most recent version of Selenium IDE. Click on that link, and allow Firefox to install Selenium and to restart.
Note: previous versions of this page included instructions about installing local customizations to Selenium. Those customizations are no longer used, and should not be installed.
Run a test suite to confirm that the setup is correct.
Start your Tomcat server if it is not already running.
In Firefox, navigate to your VIVO login page. Do not log in.
In Firefox, choose Selenium IDE from the Tools menu.
In the Selenium window, confirm that the Base URL points to your VIVO login page. you may need to type the URL manually into the Base URL field.
In the Selenium window, choose Open Test Suite... from the File menu. Open the suite at:[VIVO_HOME]/utilities/acceptance-tests/suites/InitialSetup/Suite.html
In the Selenium window, click this button: 
What you should see
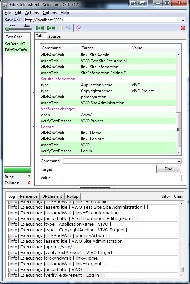
Selenium will attempt to run the test suite.
You should see each step turn yellow as Selenium attempts it, and then turn green when it is successful. The Log panel will record each step of each test, along with any error messages.
When the suite is finished, all of the tests should be green. Something like this:
Creating tests
Before writing tests
Have a plan
Plan to write a suite of tests.
Decide what functions you want to exercise.
Break the functions into separate tests.
Decide on a name for the suite, and a name for each test.
Know what steps you will perform before you start to record -- It helps to rehearse.
Remember that you can easily throw the test away and record again.
assert versus verify
Selenium allows your tests to verify certain conditions, or to assert those conditions.
- If assert fails, the test stops executing immediately.
- If verify fails, the test continues to run, but will be marked as a failure.
You can use verify to get more information about how the test failed. For example, you might want to verify 5 separate text fields to see which ones are correct. If you used assert instead, the test would stop after the first failure.
Saving tests
Each test suite should be saved in its own folder, under [VIVO_HOME]/utilities/acceptance-tests/suites
You can choose any meaningful name for the suite folder. For example user-management, or self-editing.
The suite itself must be named Suite.html
The tests must all be stored in the suite folder. Give each one a meaningful name. For example: CreateNewUser.html
Open Selenium
TBD
- Set the base URL
Create the suite
TBD
- Store in a directory under suites
- Call it Suite.html
Create a test
TBD
- Click "Record"
- Go through it.
- Click to Stop Recording.
Edit the test
TBD
- Add comments
- Change the starting URL
- Sometimes need to change "click" command to "clickAndWait"
- Sometimes need to add "wait" command
- Add other assertions (verifyElementNotPresent)
Confirm that it works
TBD
Commit to Subversion
TBD
Tips for working with Selenium
TBD
How to open the Test Suite panel (not immediately obvious):
Tips for writing tests
Auto Logout
If your test begins by logging in, put a deleteAllVisibleCookies command right at the beginning. This makes sure that you are not logged in to VIVO. If an earlier test failed and didn't logging out, this will prevent your test from failing on the login attempt.
Default selection
If a form includes a selection box which defaults to the value you want, it might make sense to explicitly select that value in the test anyway. Then, if the default value changes, the test will still work.
Links with the same name
Be sure that the locators in the tests are specific enough. An instruction to click on {{link=Add}} probably won't work if there are several links named "Add" on the page. You may need to use a more elaborate locator, like //div[@id='oprop-core-linkedAuthor']/a
Entering "Rich Text"
When you enter text into a "Rich Text Editing" area, also known as a TinyMCE frame (see image below), Selenium will not record your input. You must manually insert a command into the test, like this:
type tinymce This is my text
If there is more than one Rich Text area on a single page, this may not work. So far, I haven't seen that.

Additional information
Selenium IDE
This is the definitive introduction to the IDE. Lots of good stuff here. Please remember to install from your VIVO work area, and not from the download.
Similarly, this is the definitive reference to the Selenium command language (Selenese). Also plenty of detail about locating elements within a page.
XPath:
For more powerful means of specifying elements or
XPath tutorial with copious examples